Infrastructure Maps
Infrastructure Maps lets you manually create a schematic description of your resource/monitor topology by logically arranging each nodes of your resources/monitors over a predefined or custom background. The view renders a visualization of your devices, hosts, and their interlinkages and provides the accurate status of the various resources/monitors for quick troubleshooting.
Supported Monitor Types:
- Internet Services
- Servers
- Network
- APM
- AWS
Overview
To deliver a top-notch service to your customers, your IT department and Network engineers need a service-aware view of your infrastructure. Site24x7's Infrastructure Map lets you create a wide variety of maps such as:
Site24x7's interactive infrastructure mapper tool lets you understand how each of your devices relate to the other. You can manually add, edit, move and resize monitors in your Site24x7 account, so that the view renders your monitor's exact infrastructure dependencies.
Features
- Apart from being a pictorial representation of your network topology, it helps you proactively identify performance bottlenecks and resource outages instantly.
- Pinpoint the actual physical location of your IT resource in a datacenter or on a global map. Observe and monitor the actual real-time performance data of the monitor.
- Identify all dependent resources from a single map. Predict all issues beforehand by viewing the dependent/affected devices and network interlinkage issues from an administrator's point-of-view.
Creating your Infrastructure Map
You can build your Infrastructure Map by following the steps below:
- Login to Site24x7
- Navigate to Home > Dashboards > Infrastructure Maps > Create New
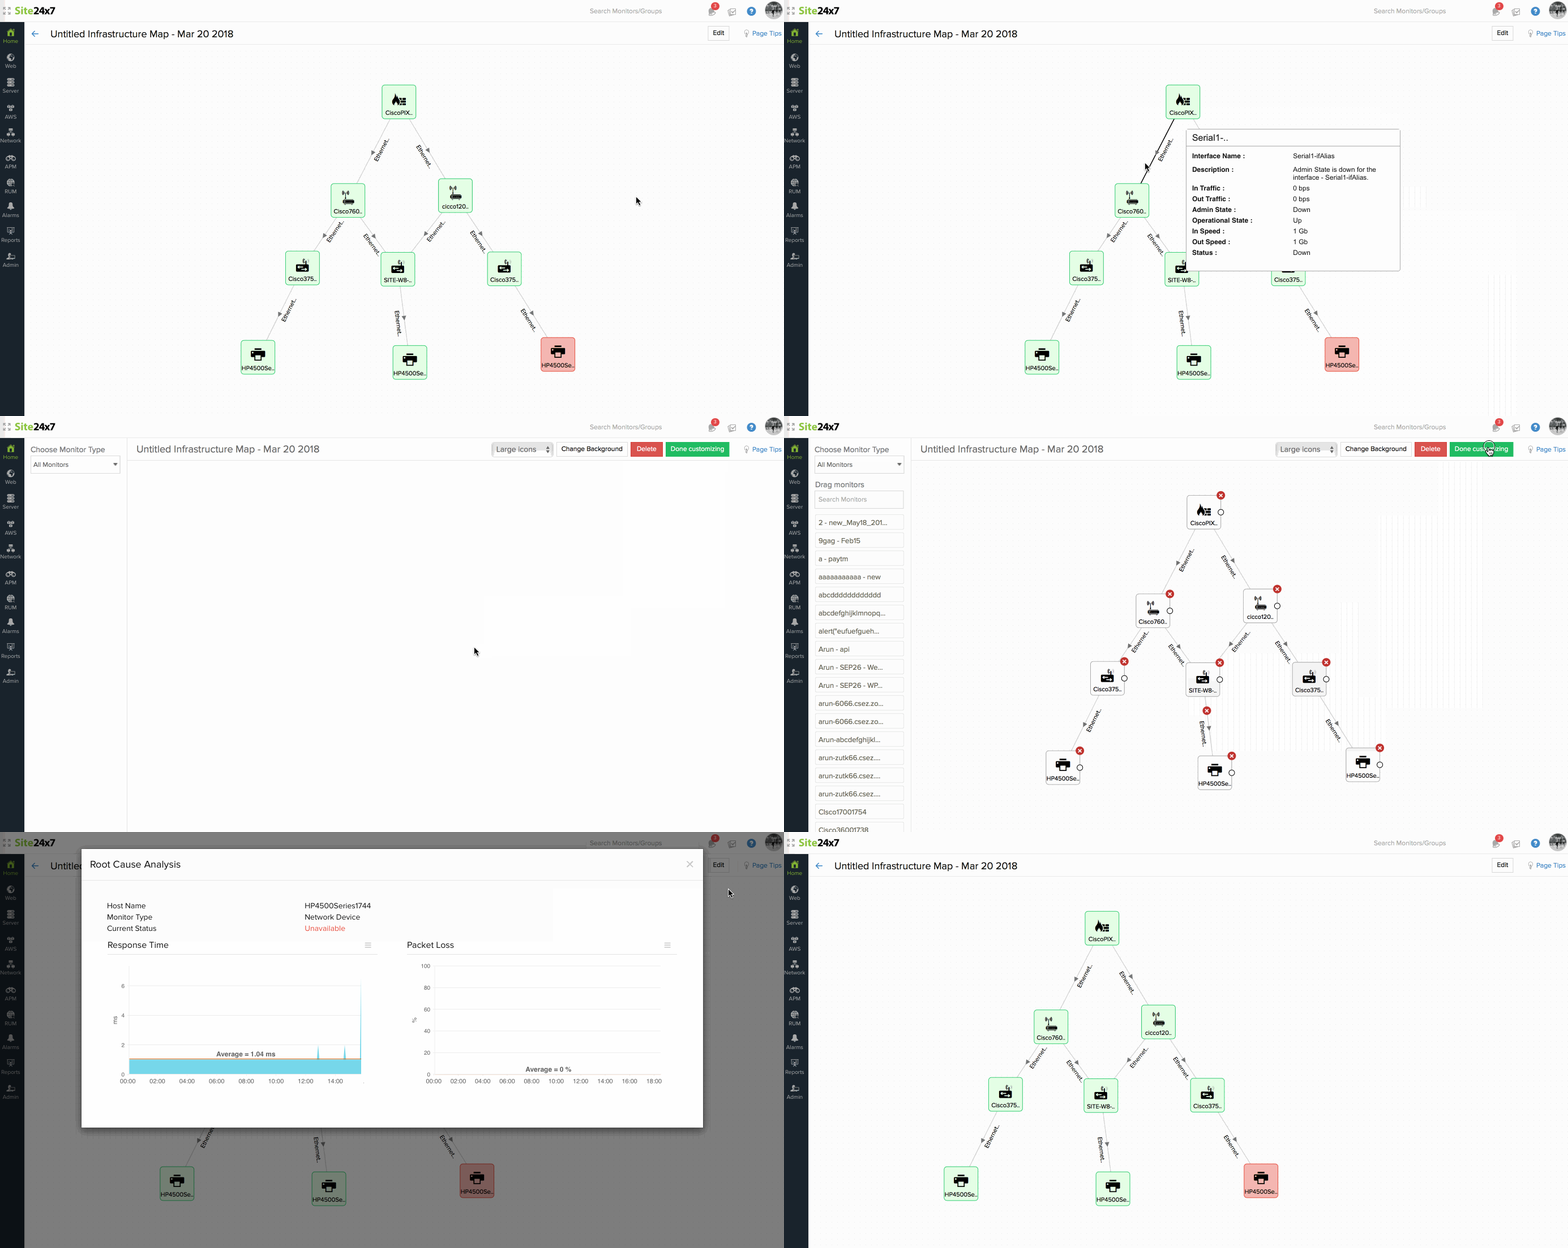
- You're now redirected to the Infrastructure Map Editor view. Site24x7 aggregates and shows all the configured monitors in your Site24x7 account on the left side panel of the editor screen. You'll have an option to filter monitors by Monitor type and also search a monitor from the search bar.
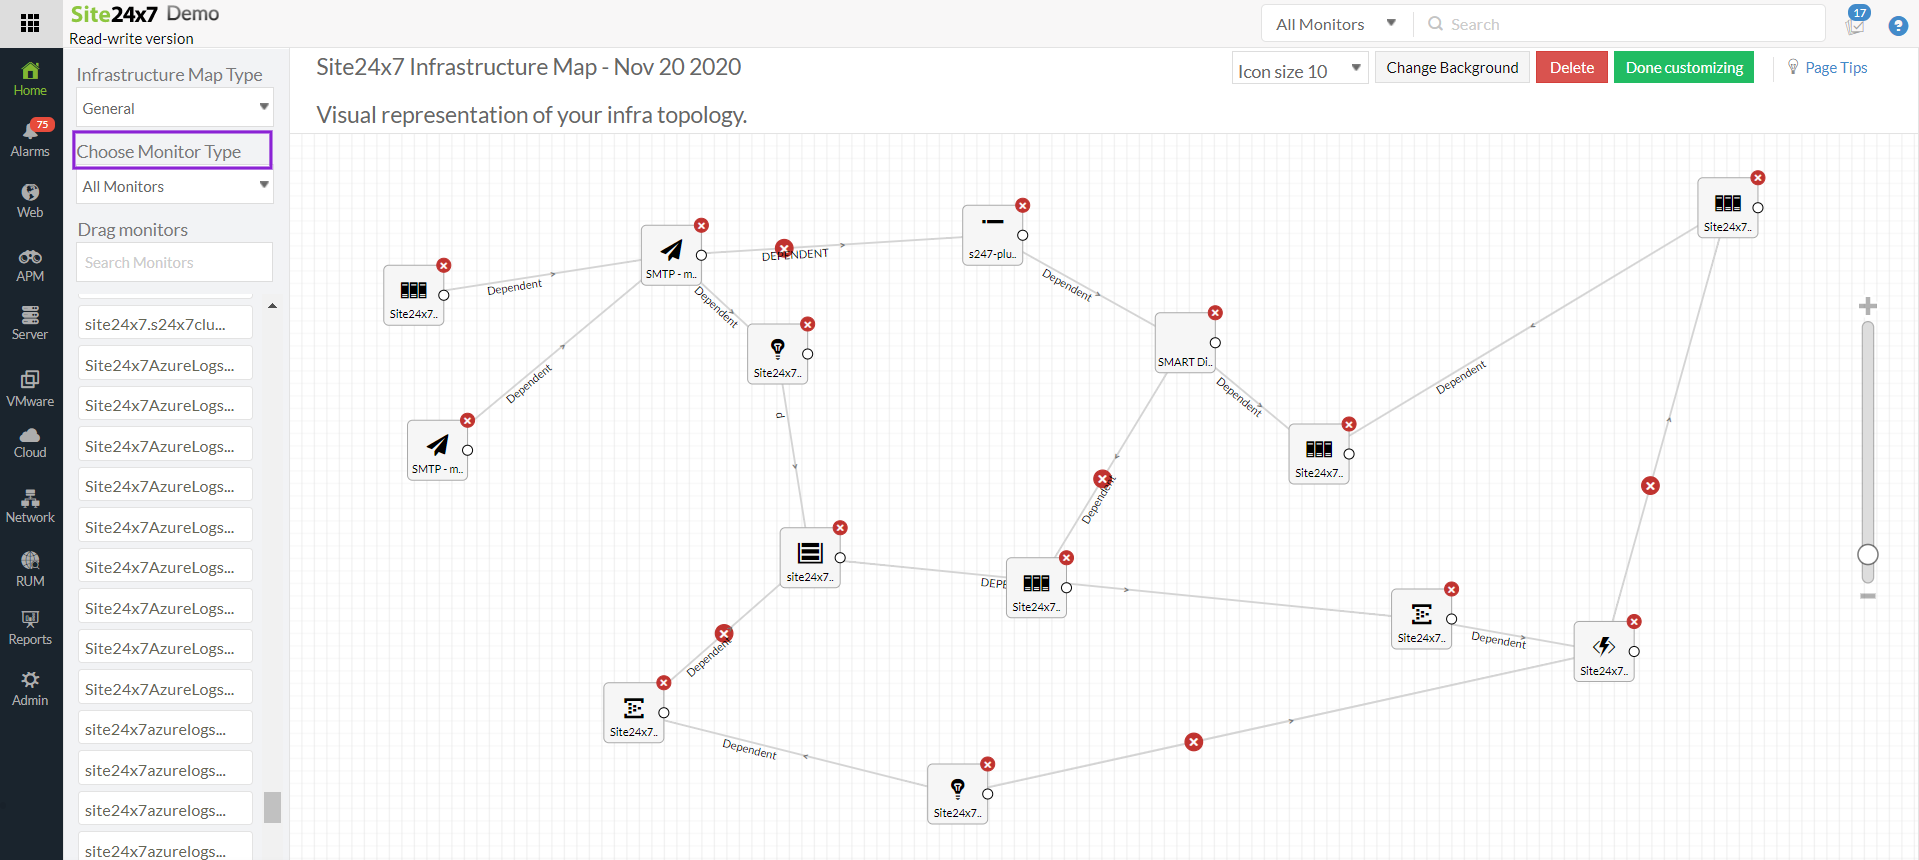
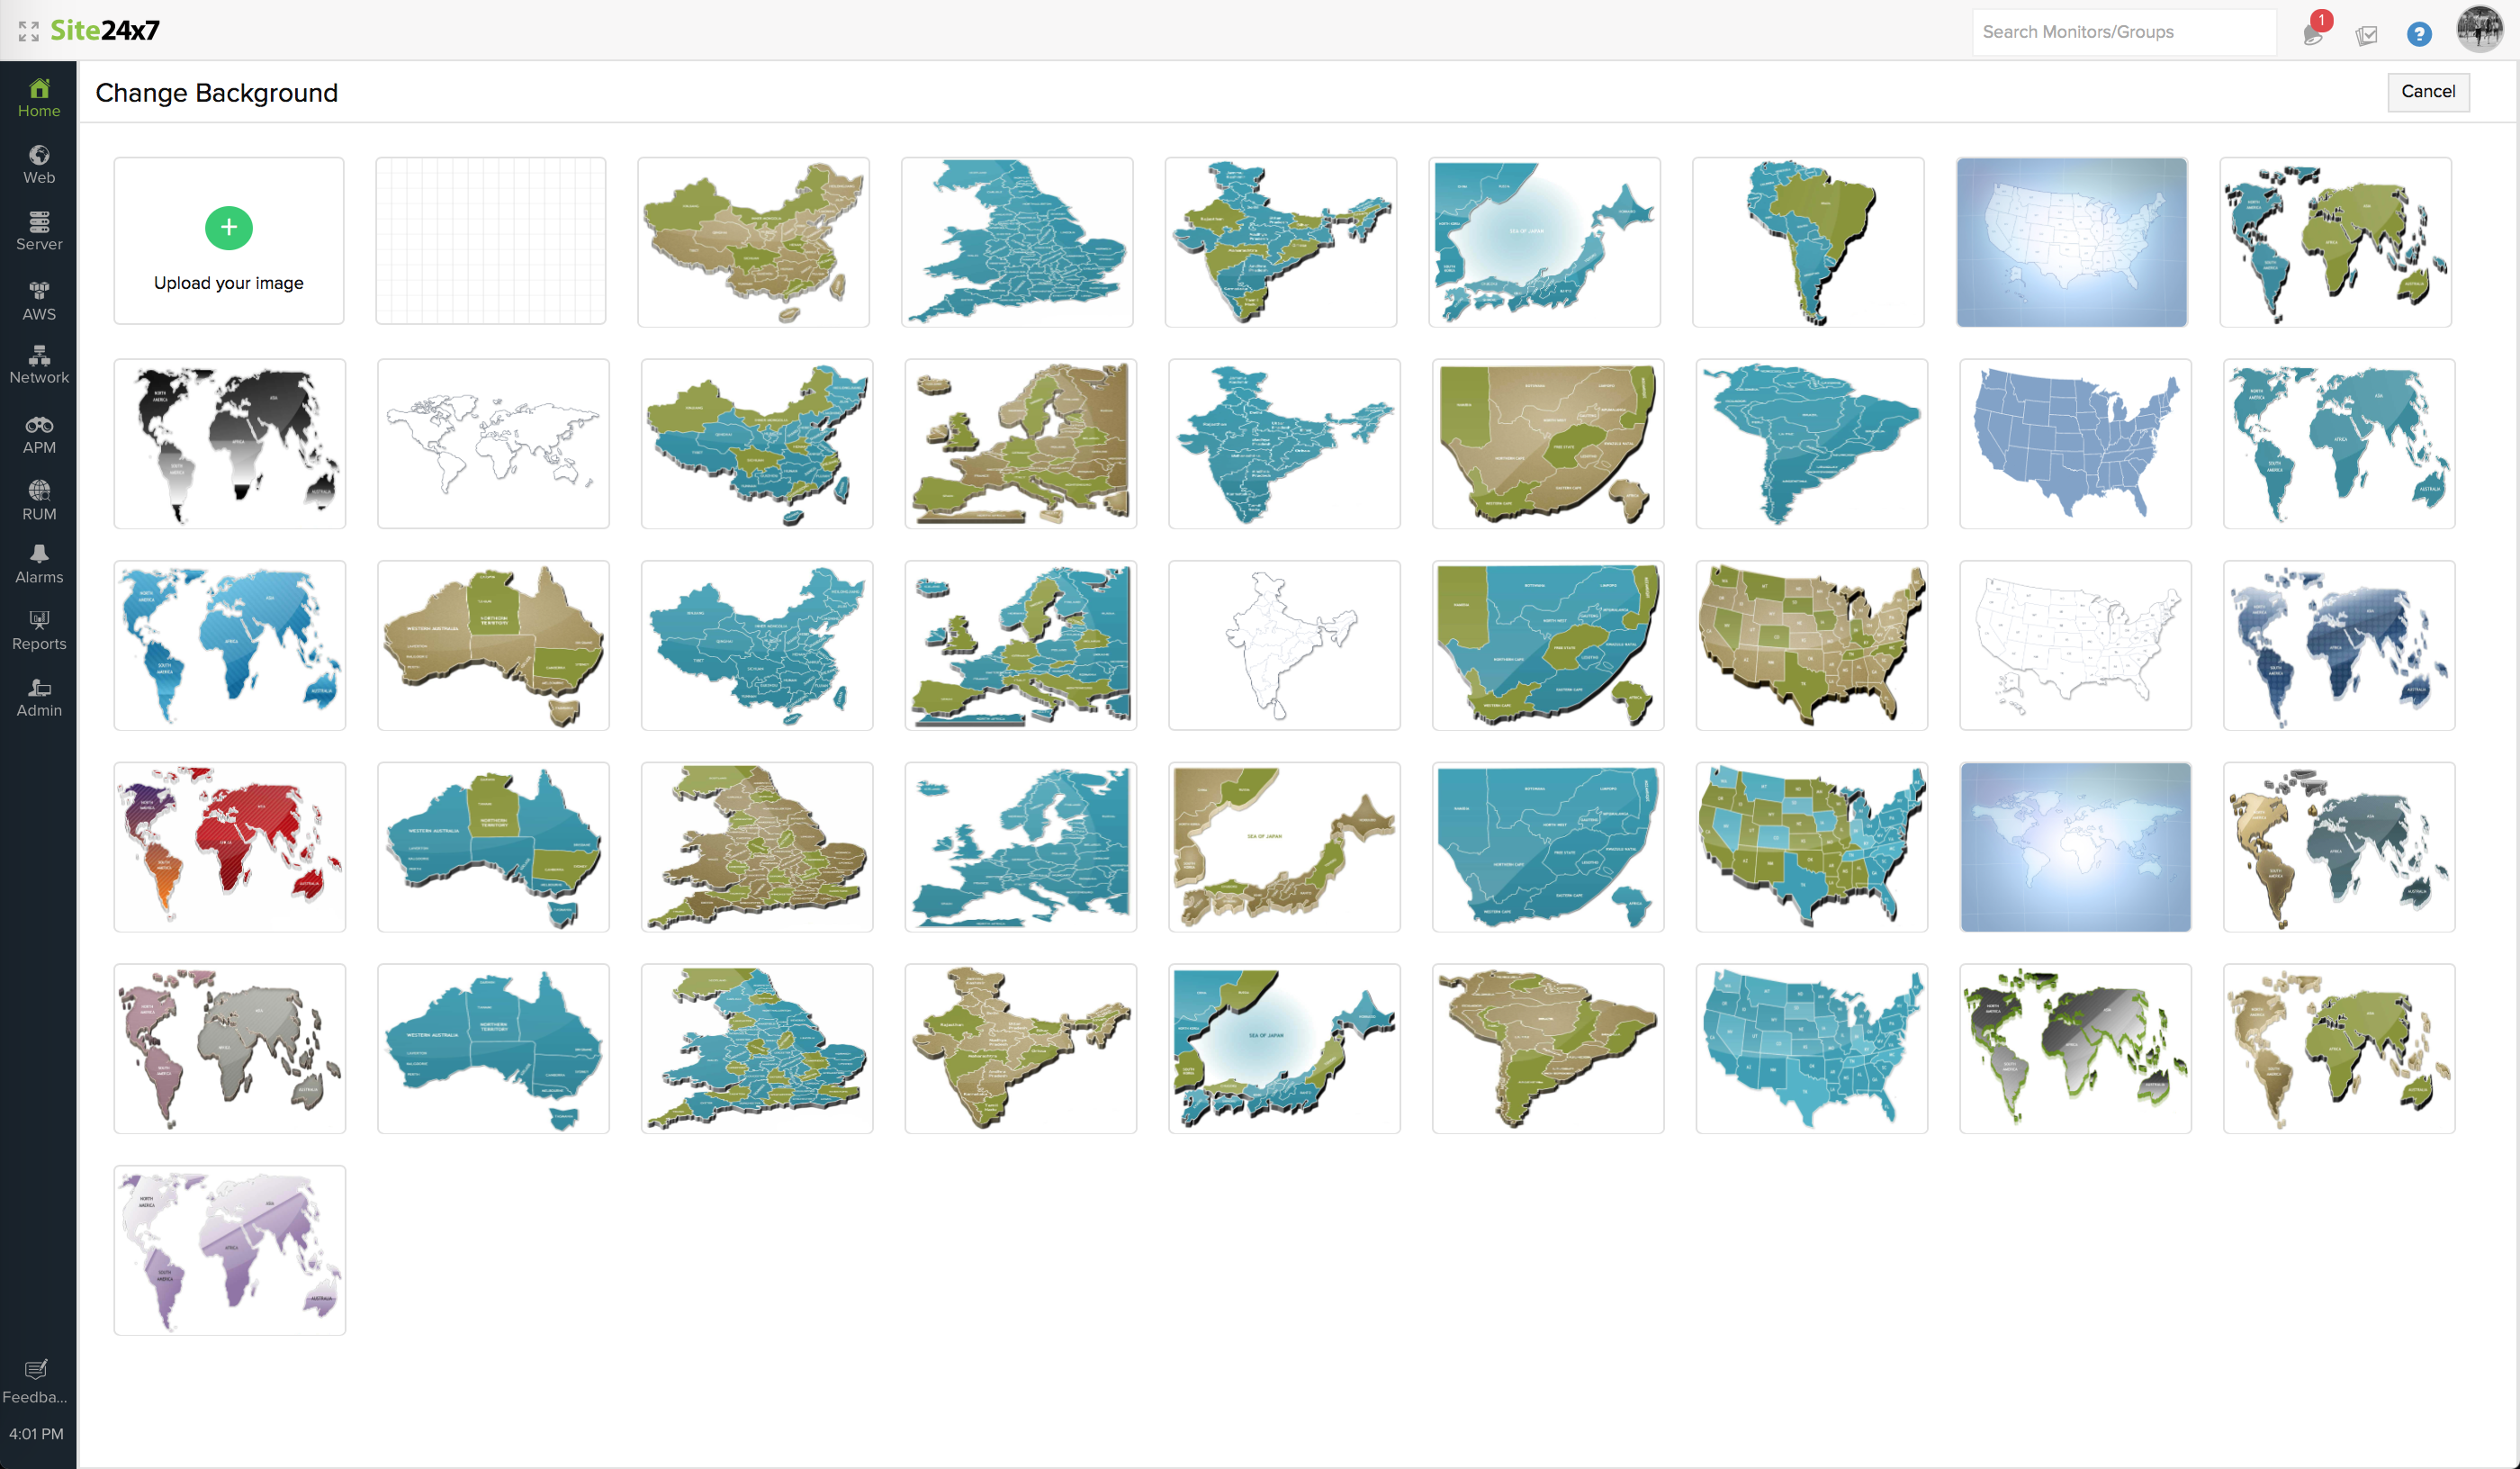
- You can change the background of the editor by clicking the Change Background button. You'll have multiple background templates to choose from, such as World maps, Continental Maps, Country Maps, and Grid lines. You'll additionally have an option to import a custom background image by clicking the Upload your images button.
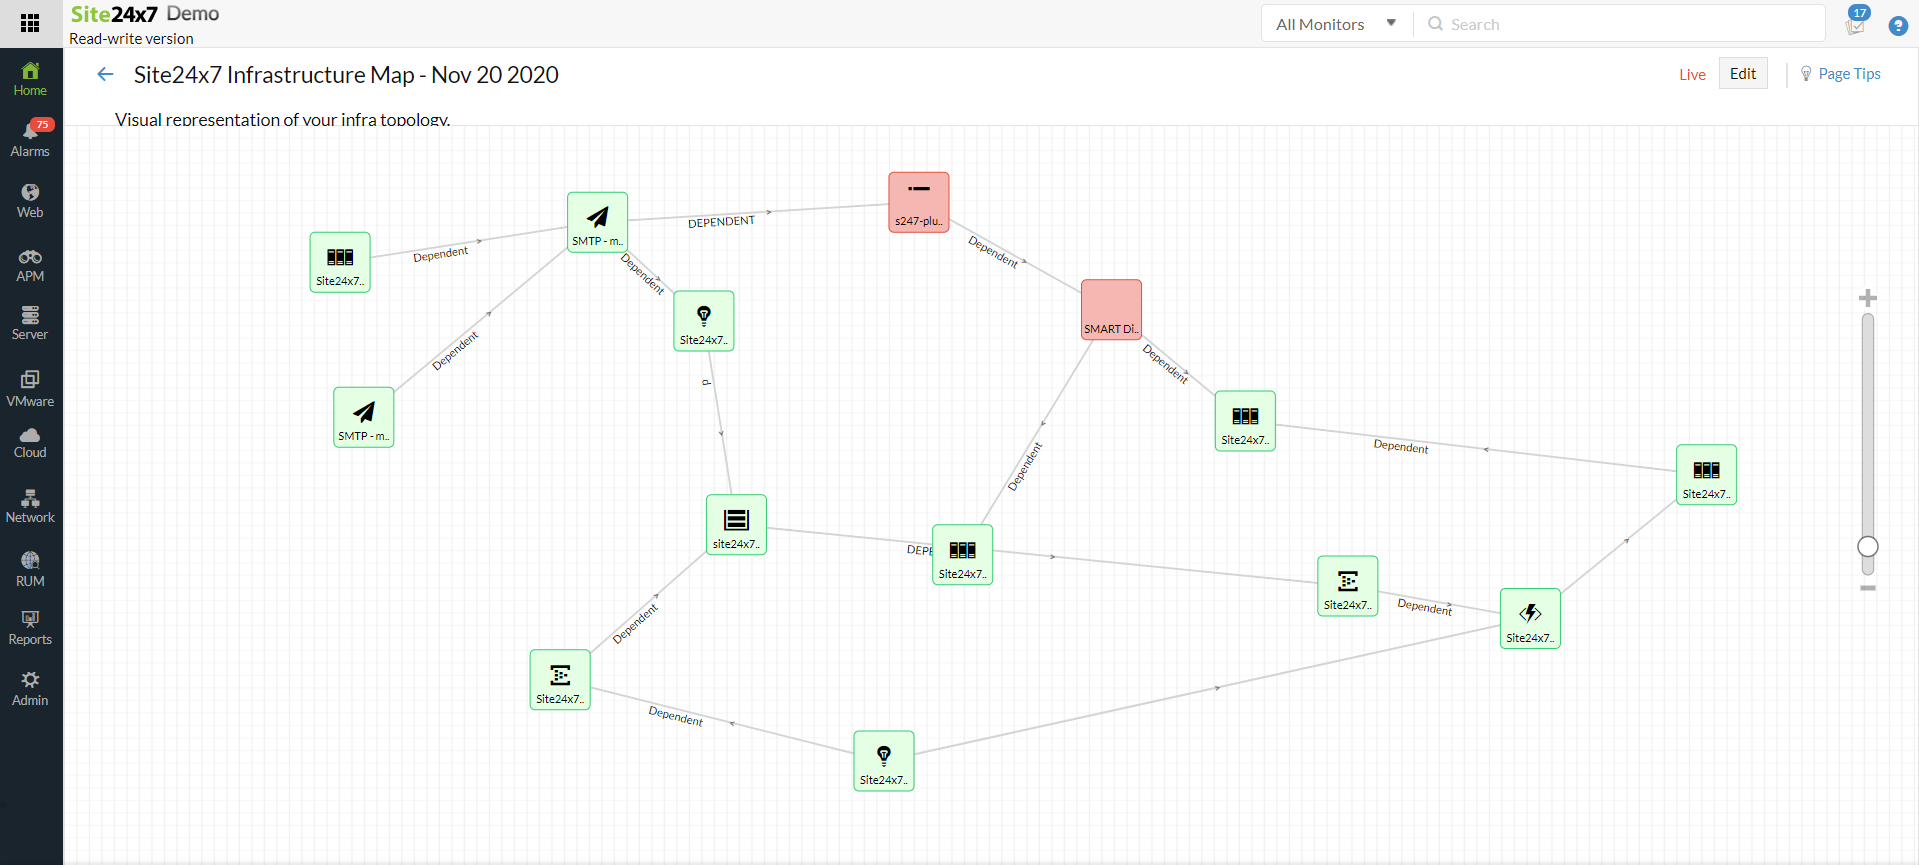
- Once you've set your background image, drag and drop the selected monitor from the left panel onto the canvas. You can resize your monitor icon based on your need, just select Large icons or Small icons from the drop-down.
- Once you add multiple monitors onto the canvas, you can create interlinkages by drawing a line between the mini-circles attached to every monitor icon.
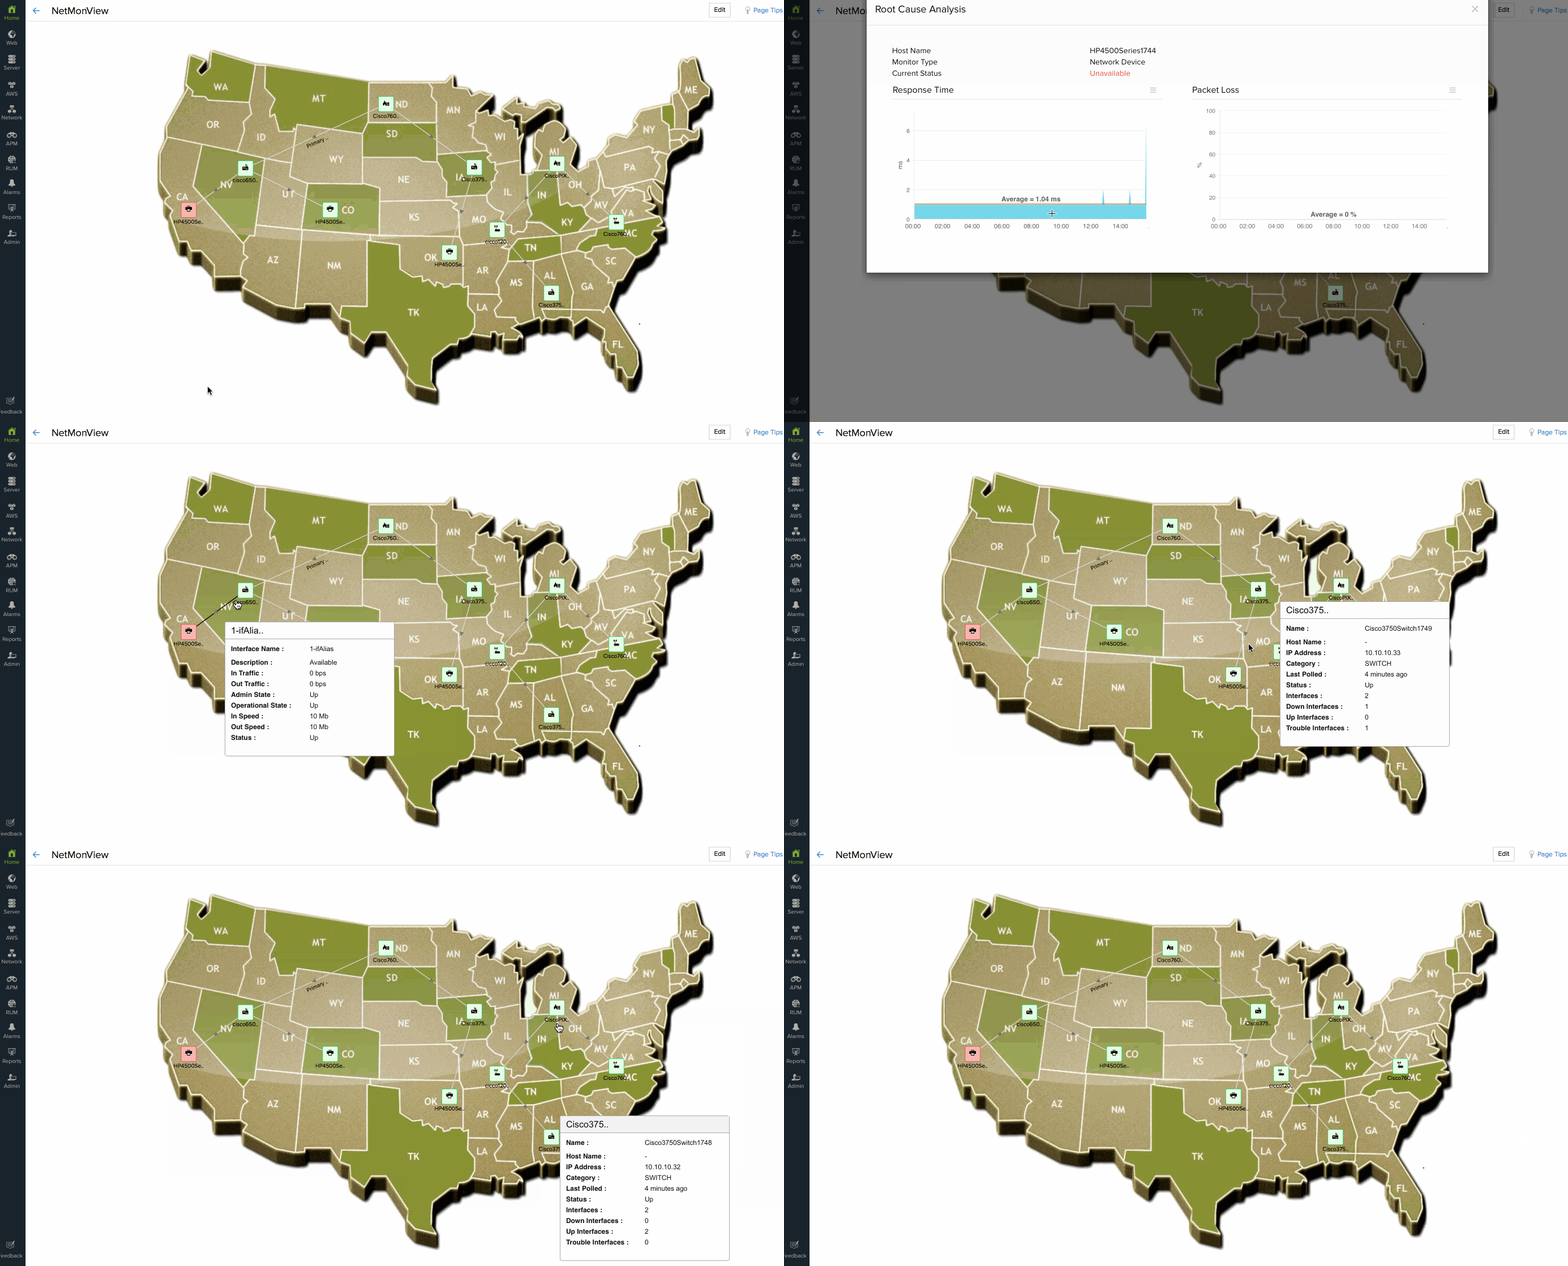
NoteIf you've opted to draw an linkage line between two network devices, you'll be prompted to select the network interface used to connect these devices. In the Infrastructure map view, the interlinkage line joining the two network device turns to RED or ORANGE when the selected interface is Down or in Trouble status.
- Once you've drawn your infrastructure view over the background image, click the Done Customizing button. Your infrastructure map is created and listed in the Dashboards View.
- Click the Delete button to remove the Infrastructure map permanently from your records.
Global, Regional, and Physical location based Maps
You can virtually connect geographically distributed remote sites by drawing interlinks between various edge resources. You have to set a relevant geographical world map or a relevant background image and then envisage how well the connections and the edge monitors between these geographically scattered locations are operating. As a network admin, you might have to keep a watch on all your network devices around the globe or your data center. Monitoring their performances from individual dashboards or tabs might give insights on their performances individually but not on the entire network. Network infrastructure maps allow you to map all your devices across the globe or your in-house datacenter and view them in a single window.
You can also get a complete overview of your servers, their position in the server racks using the Infrastructure map. For this, you just have to add an image of the server rack, place all your server in appropriate positions, map them, and start monitoring them.
Heirarchical Maps
Network devices that are inter-connected often face issues and induce unexpected errors. With the heirarchical view in place, you can correctly configure them based on their dependencies so that errors and connectivity issues can be visually tracked and fixed before your customers are affected. With a wide range of network devices in place, it is best to group resources according to ther dependencies and draw the linkages. This will help you elude cluttered maps and helps break-down your infrastructure view during advanced troubleshooting. With the heirarchical view in place, you can easily find what all devices are down, why are they down, and take quick corrective measures as you get all these details from a single console.
Virtualized Network
The heirarchical view can be applied to all your virtualized networks such as, Hyper-V and VMware vSphere environments. The below image depicts a VMware environment and the various interlinkages.
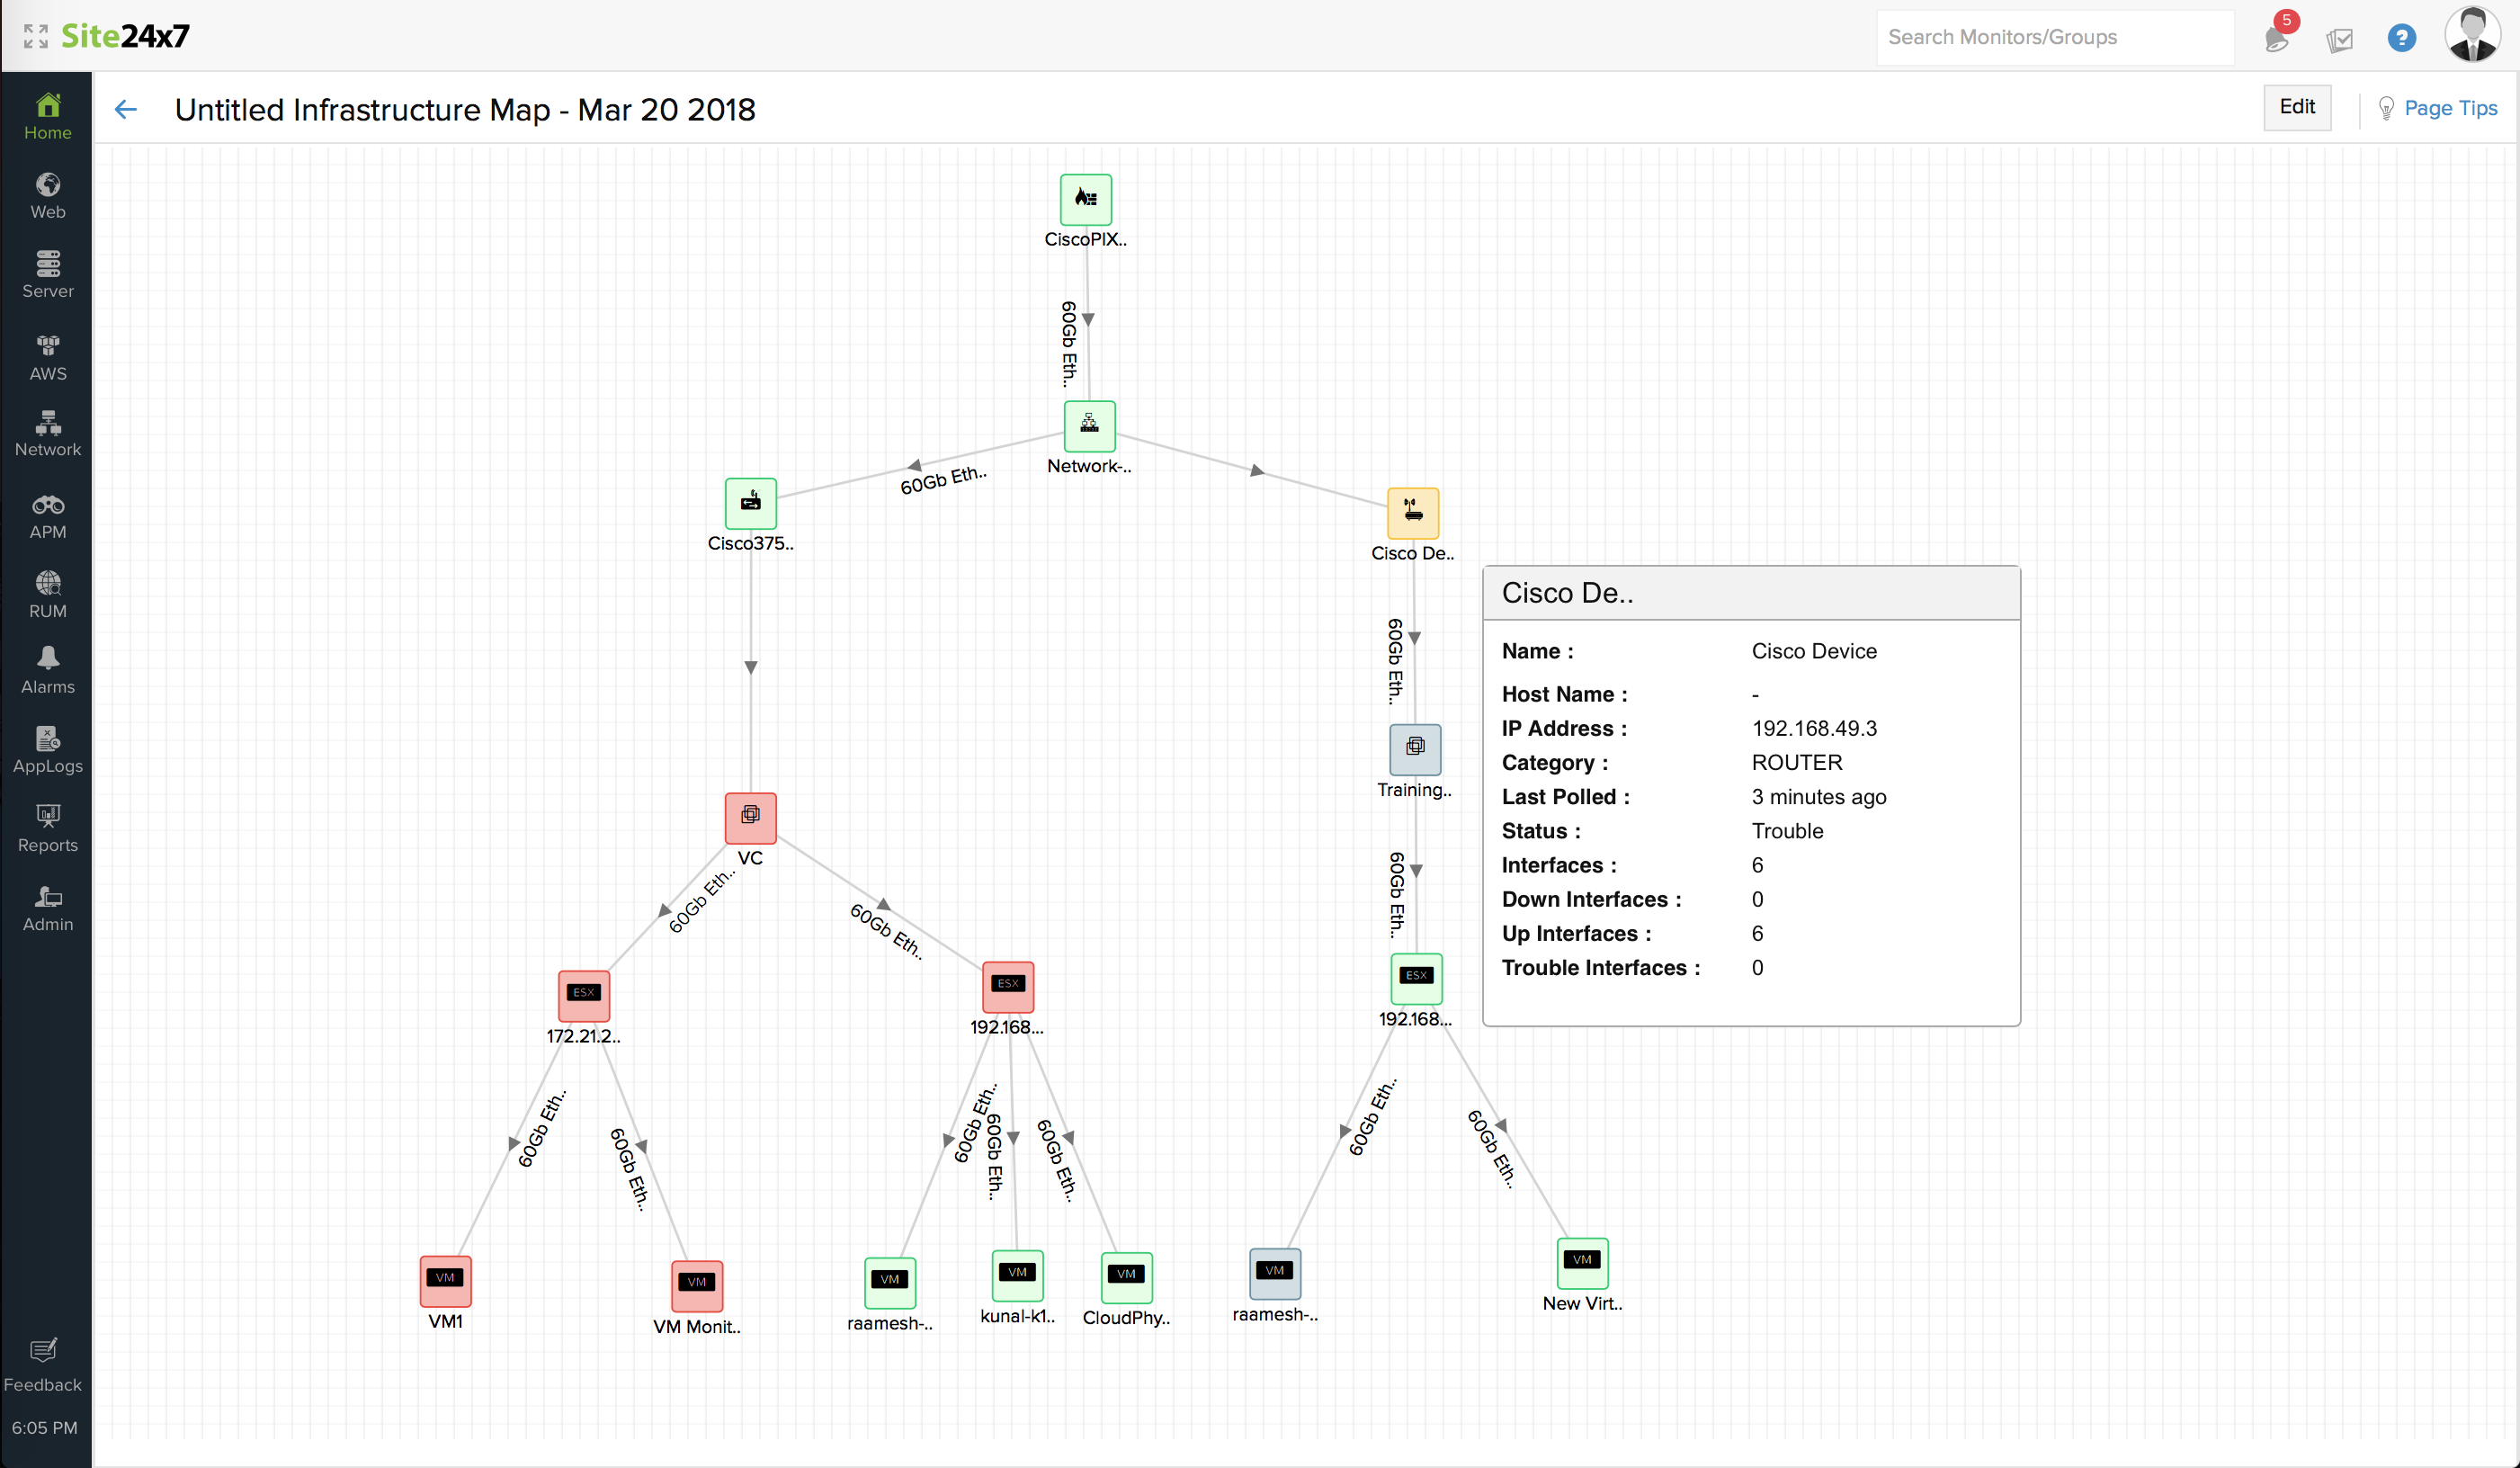
You can also automatically discover and map a complete network, with each interconnection clearly labeled within your configured IP range using Layer 2 maps.
