SaaS Synthetics (Browser) monitoring
Site24x7's SaaS Synthetics (Browser) monitor helps you ensure that the SaaS applications you're using are connected perfectly to your environment and are functioning well. The monitor currently supports a few of the popular SaaS applications, like Microsoft Outlook, Microsoft Teams, Salesforce, Microsoft Dynamics 365, and many more.
Supported SaaS applications


Use cases
Imagine that your team is using Microsoft Teams for your meetings, and it is used within your network. You aren't aware of the firewall changes or account-specific changes that have happened, and you try to connect to the account in vain.
Here, Site24x7's SaaS Synthetics (Browser) monitor can help by constantly checking everything right from the login stage. Once you provide a configuration for that particular account, Site24x7 tracks changes to the SaaS application, and if there are any changes to the UI, Site24x7 provides those as predefined transaction steps.
Adding a SaaS Synthetics (Browser) monitor
-
Log in to Site24x7 and navigate to Monitors > Add Monitor > SaaS Synthetics (Browser)
-
Choose the SaaS application of your preference.
-
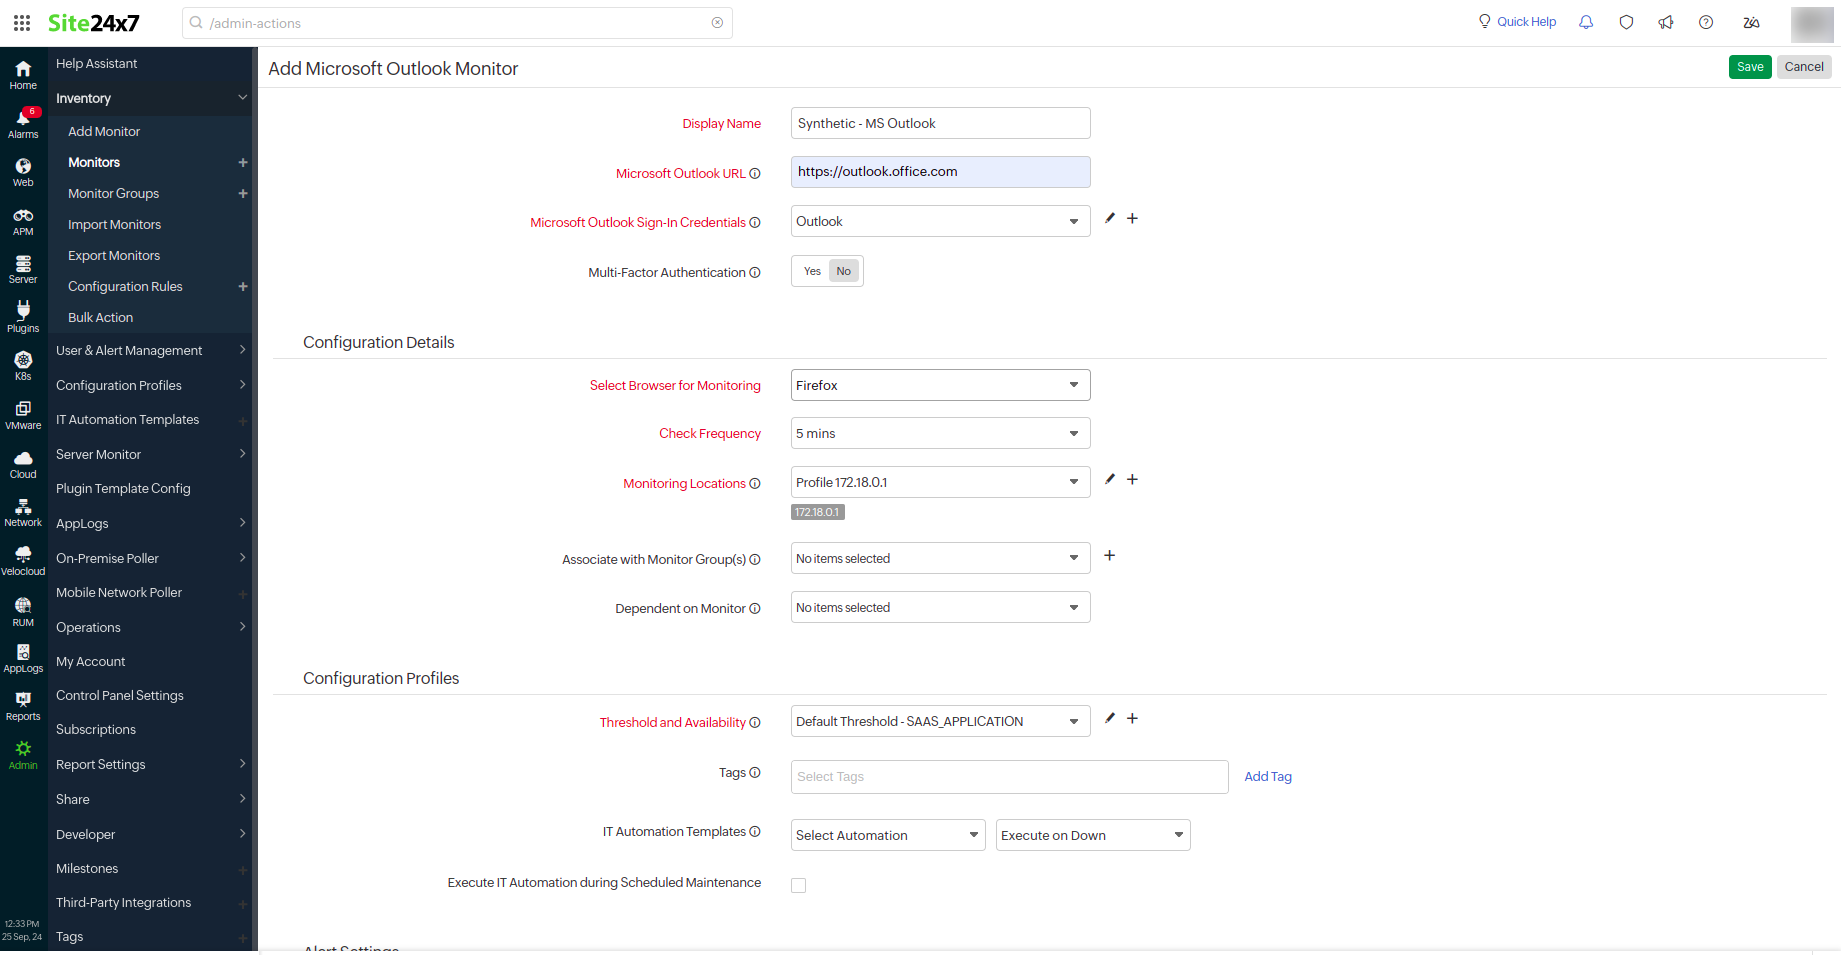
For the Display Name, provide a name to identify the monitor.
-
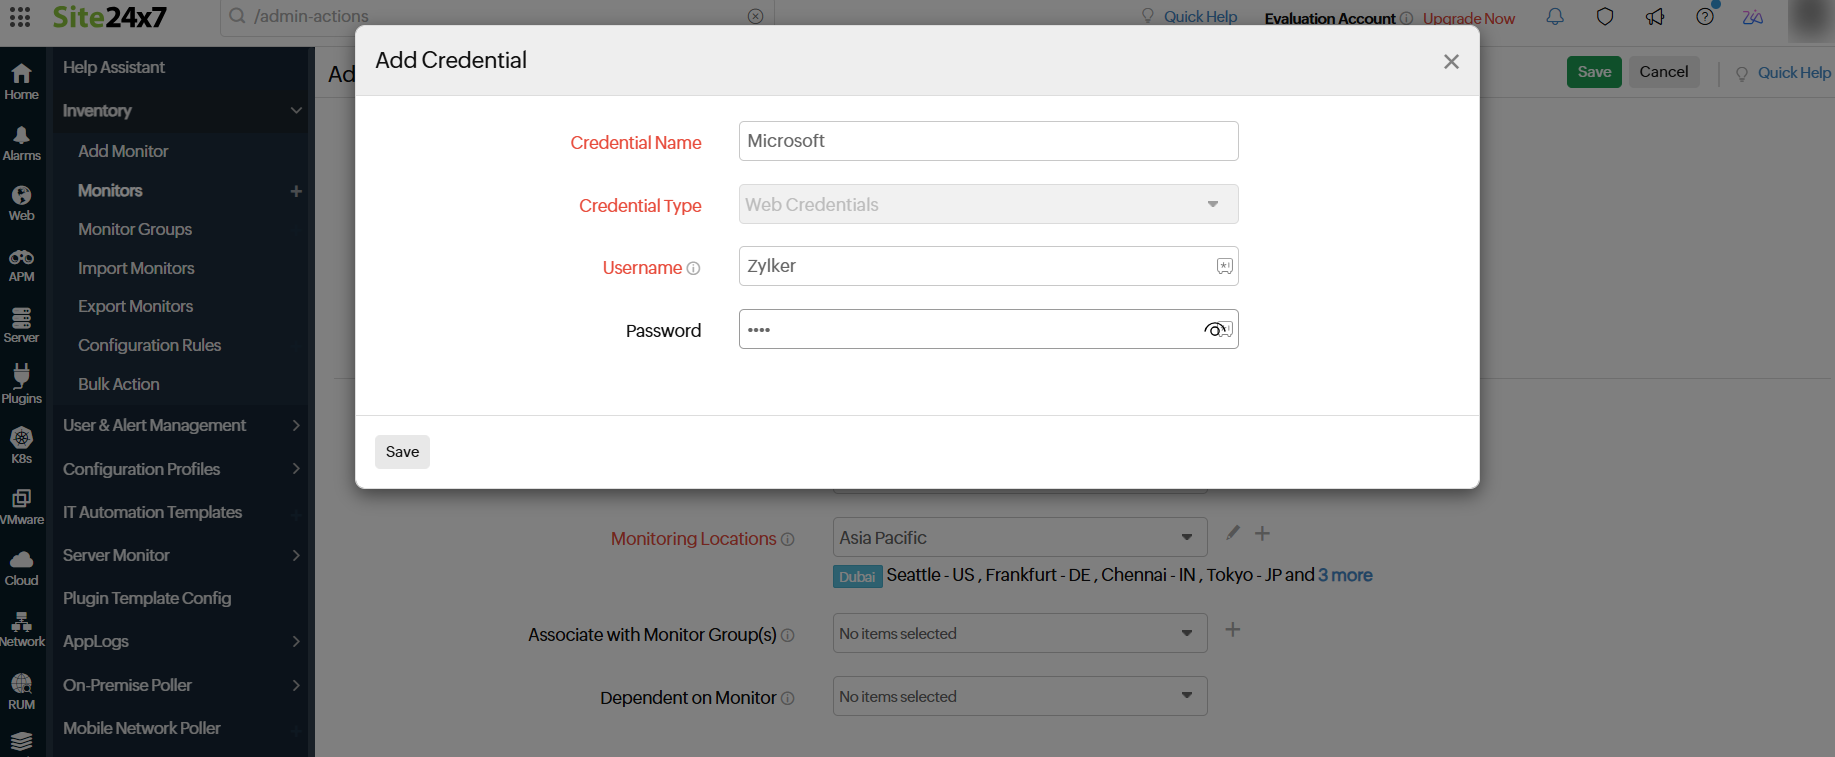
For Sign-In Credentials, create or choose the credentials associated with the SaaS application.

-
For Multi Factor Authentication, click Yes if your account uses multi-factor authentication.
NoteThis option is supported only if the application has a Time-Based One-Time Password. Time-Based One-Time Password (TOTP) is a type of two-factor authentication (2FA) method that relies on a mobile app like Google Authenticator or similar apps like OAuth or Microsoft Authenticator.
To monitor an application with MFA/TOTP using your recorder, you can copy your account's secret key from the website and add it.
-
For the Secret key, obtain the secret key from the application.
-
For the Configuration Details section, provide the following details to set the configurations:
- Select Browser for Monitoring: Choose the browser of your preference.
- Check Frequency: Configure the frequency at which you would like to check the monitor from various locations.
- Monitoring Locations: Choose the On-Premise Poller created for your account or click the + button to create a new On-Premise Poller. Learn how to add a new On-Premise Poller.
NoteSaaS Synthetics (Browser) monitor can be configured only with the On-Premise Poller locations.
- Associate with Monitor Group(s): To ease administration, monitors can be organized into monitor groups based on the business application, geography, type, resource ownership, and more. Choose an existing monitor group or create a new one. Read more about monitor groups and how they can help you.
- Also, monitor group support for monitors allows a monitor to be associated with multiple dependent resources in different monitor groups. During a normal monitor status check, if any one of these dependent resources' statuses is identified as Down, the alert for the monitor will be automatically suppressed. However, the dependency configuration at the monitor level is always given the highest priority over any monitor-group-level dependency configuration for suppressing alerts.
- Dependent on Monitor: Select a monitor from the drop-down to choose it as your dependent resource. Alerts to your monitor will be decided based on the status of your dependent resource. For example, alerts will be suppressed if the status of the dependent monitor is also down.
-
- Configuring a dependent resource and suppressing alerts based on its status is part of providing you with better false alert protection. Site24x7 thereby helps limit the number of alerts. Learn all about alert suppression at the monitor level.
- If you select None in the Dependent on Monitor field, alerting will progress according to your normal configuration settings. No alerts will be suppressed in this case as the monitor doesn't have any dependencies.

-
For the Configuration Profiles section, provide the following details:
- Threshold and Availability: Configuring thresholds helps you get alerted in case of any changes so you can address performance issues immediately. Learn all about configuring thresholds. Select a Threshold Profile from the drop-down or choose the default threshold set available to get notified when the resources cross the configured thresholds and availability.
- Tags: Select tags for help in classifying and discovering resources in your Site24x7 account. Tags offer the flexibility to manage and sort your Site24x7 monitors, related alerts, and reports by adding your own custom metadata in simple name-value pairs and associating them with these resources. Learn how to create tags.
- IT Automation Templates: Select the automation to be executed when any attribute changes or when the status of your monitor is Down, Trouble, or Up. The defined action will be executed when there is a state change, and the selected User Alert Groups will be alerted. Learn how to create an automation template.
- Execute IT Automation during Scheduled Maintenance: Configuring a scheduled maintenance window allows you to suppress alerts for selected IT resources during routine maintenance tasks. Click the check box to enable the option to execute IT automations—script executions, server commands, and more—during this period.
-
For the Alert Settings section, configure your preferences to get notified in case of any changes to configurations:
- User Alert Group: User Alert Groups help you organize contacts or users into specific groups to receive alerts and notifications about them. Associate the contact with an appropriate contact group so that the monitoring alerts will reach the contact. Additionally, associate an Attribute Alert Group to send attribute-specific alerts to your contact list. Read more about User Alert Groups and how to create them.
- On-Call Schedule: You can use the On-Call Schedule option to ensure that the notifications are sent to assigned individuals available during specific shift hours, helping them quickly respond to alerts or incidents. Choose an On-Call Schedule of your preference from the drop-down or create a new On-Call Schedule.
- Notification Profile: A Notification Profile helps you configure who should be notified and when in the event of downtime. Choose a Notification Profile from the drop-down or select the default profile that is available. Learn more about Notification Profiles and how to add them.
-
For the Third-Party Integrations section, provide the following details:
- Services: Associate your monitor with a preconfigured third-party service. This option lets you push your monitor alarms to selected services and facilitates improved incident management. If you haven't set up any integrations yet, navigate to Admin > Third-Party Integrations, view the list of supported third-party services, and create an integration. Have a look at the supported third-party services.
- Click Save. Now your monitor is added.
Learn more about the various performance metrics of a SaaS Synthetics (Browser) monitor.
Related links
-
On this page
- Use cases
- Adding a SaaS Synthetics (Browser) monitor
