Brand Reputation
Web Risk list is a repository maintained by Google that comprises a list of URLs perceived to contain malicious code, i.e, malware, untrusted software and social engineering tactics, such as phishing and other forms of deception. Site24x7's Brand Reputation monitor checks your website against regularly updated Web Risk list and notifies you if your website is affected. Since any website containing malware or suspicious for phising activity is seen as a threat to the online community and is often penalized by search engines, any insight from this monitoring will let you steer away from any such malicious code in your site to keep your brand reputation intact. The Monitor allows you to add unlimited URLs for Brand Reputation check. However, 10 URLs in a Brand Reputation monitor will consume one basic monitor license. Additional basic monitor license will be utilized for more than 10 URLs. The default check frequency is set as one hour.
Video
Here's a quick video that shows how brand reputation monitoring works:
Adding Brand Reputation Monitor
- Login to Site24x7.
- Click Admin > Inventory > Monitors > Add Monitor.
- Select Brand Reputation to add a new Brand Reputation monitor.
- Specify the following details to add the Brand Reputation monitor:
- Display name: Provide a name to your monitor.
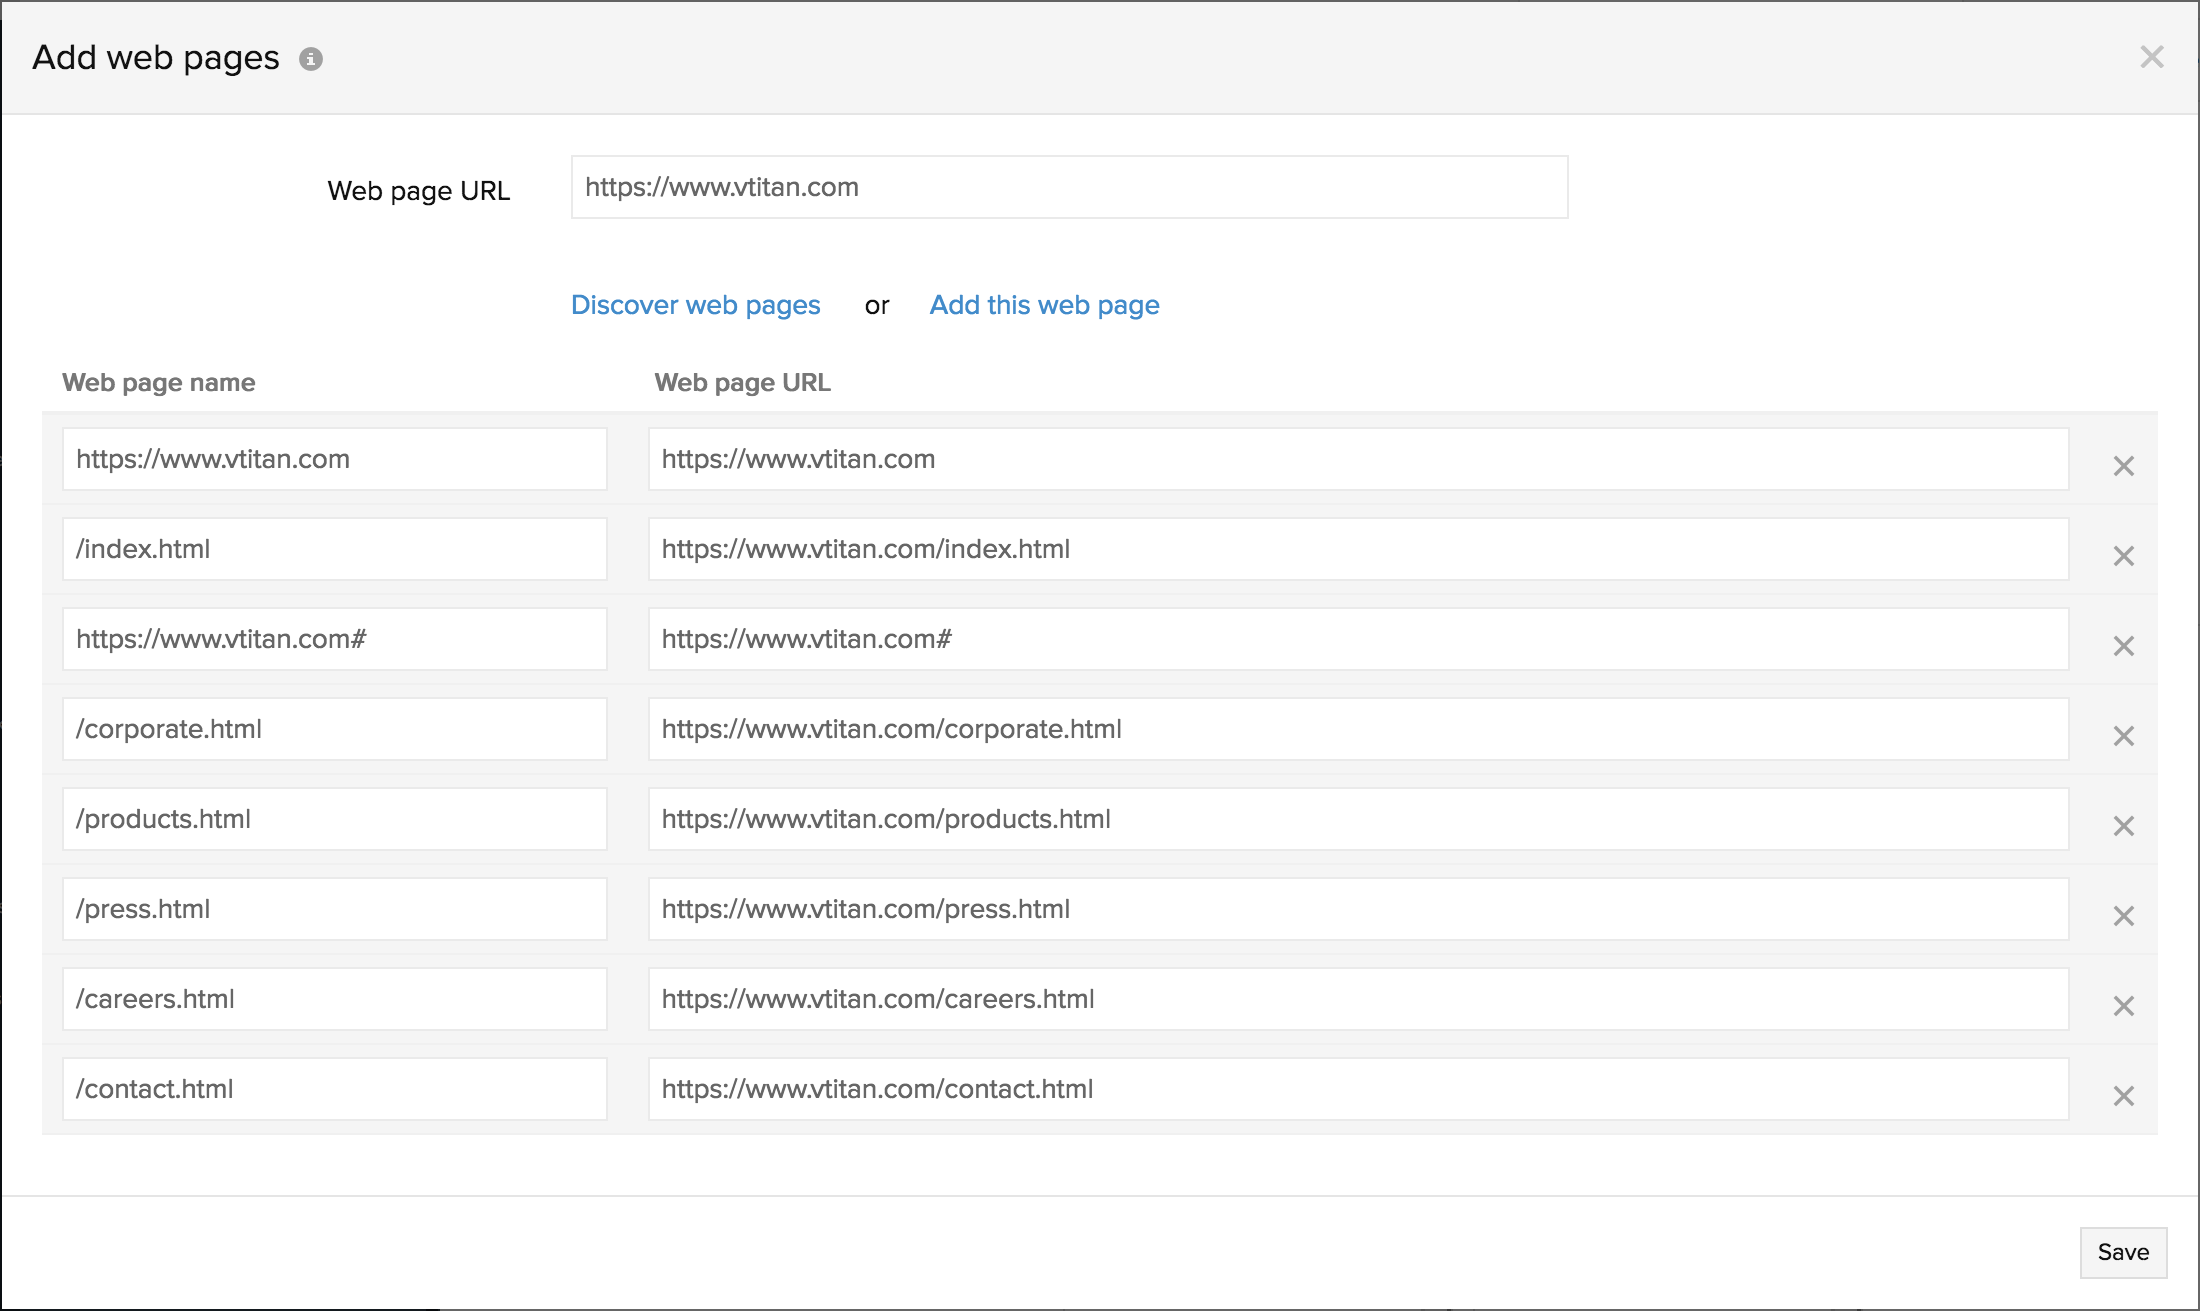
- Add Web pages: Specify multiple domain names and respective web page URLs for which brand reputation check has to be done. You can either manually add unlimited URLs to the list or automatically fetch the URLs list using the wizard.
Manual Addition of URLs: You can manually add unlimited URLs to check for brand reputation. Enter the web page URL and click Add this web page. You can click on the + icon to add more URLs to the list or click X to remove a web page URL.
Say you've one basic monitor license in your Site24x7 account and you've entered 12 URLs for Brand Reputation check. Only 10 URLs will be added for monitoring, and the remaining two URLs will be automatically ignored. You can add further URLs for monitoring after purchasing additional monitor license.
- Wizard-based Addition of URLs: You can auto-populate a list of URLs of your domain and add them for Brand Reputation check. Enter the Domain URL and click Discover web pages to fetch all the related URLs of that domain. Once a list is generated, you can modify the list of URLs before submitting them for monitoring.
You can update the existing list of URLs by providing a new domain URL and then fetch the new list of URLs. The web pages that are discovered will be added to the existing list of URLs. Click Save to update the changes.
NoteConsider the scenario where you have two basic monitor license available in your subscription. In this case, you can add 20 URLs for monitoring. However, if the wizard has discovered more than 20 URLs,the one's that were added recently will be discarded and only the first 20 URLs will be added for monitoring.
- Monitor Groups: You can associate your monitor with multiple monitor groups by selecting the relevant monitor groups from the drop down list. This allows in logical grouping of your monitors.
To learn how to create a monitor group for your monitors, refer Monitor Groups.
Configuration Profiles
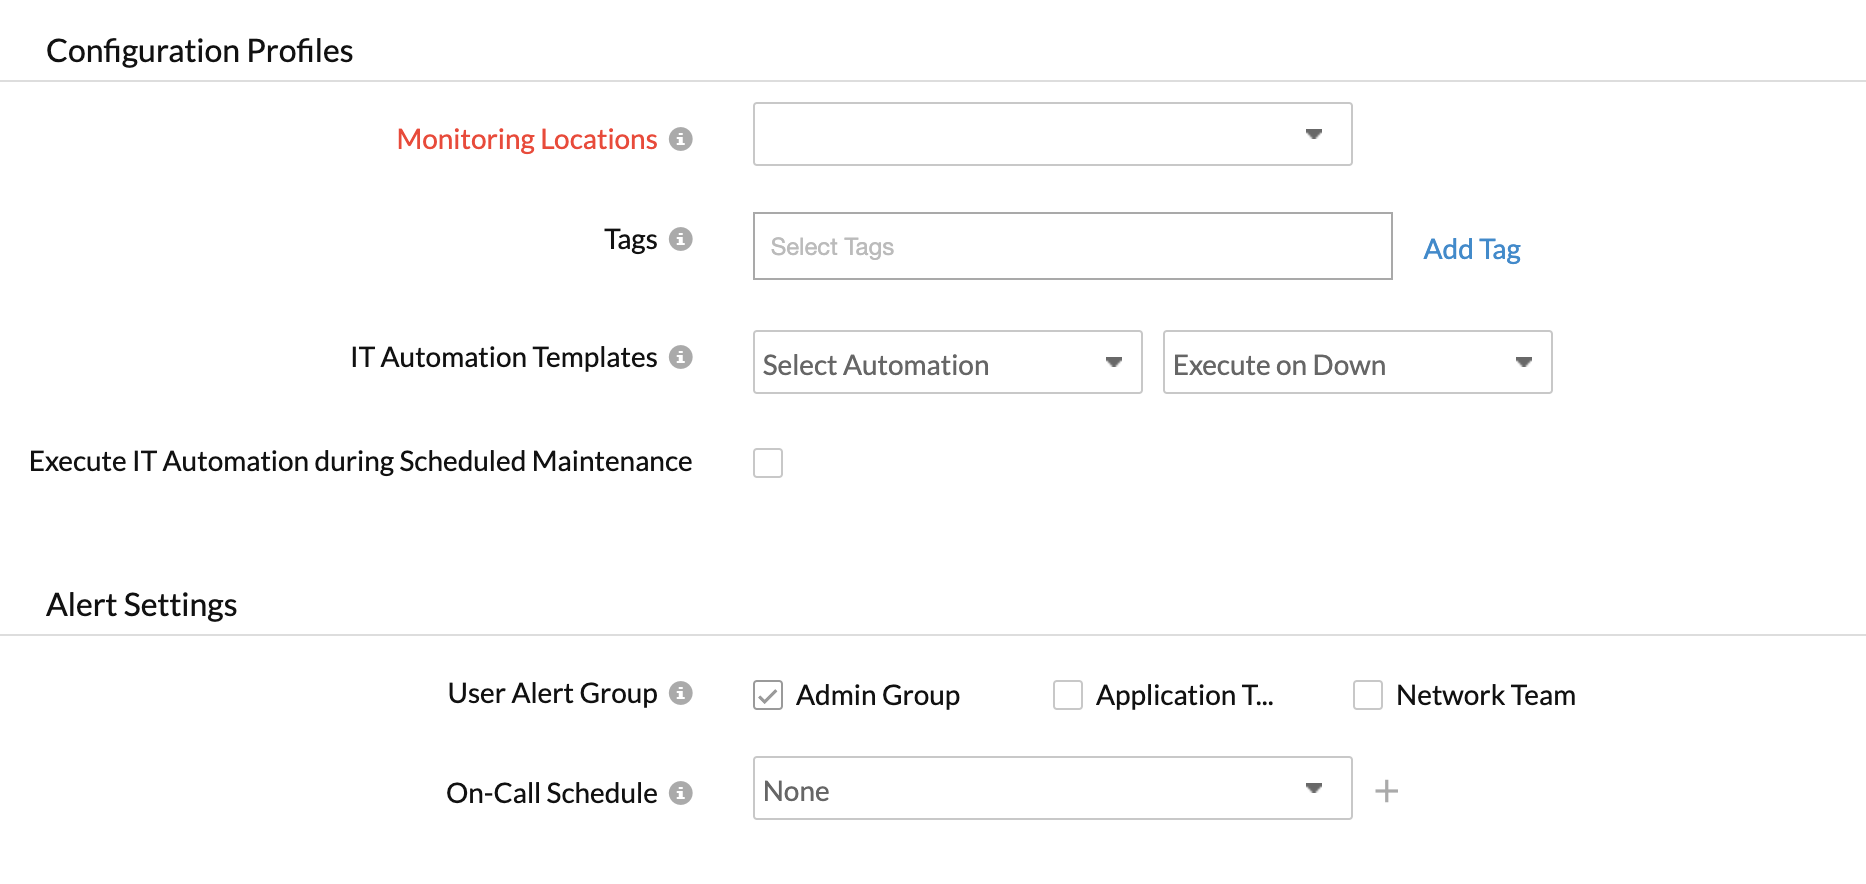
- Tags: Associate your monitor with predefined Tag(s) to help organize and manage your monitors creatively. Learn how to add Tags.
- IT Automation: Select an automation to be executed when the website is down/trouble/up/any status change/any attribute change. The defined action gets executed when there is a state change and selected user groups are alerted.
To automate corrective actions on failure, refer IT Automation.
Alert Settings
- User Alert Group: Select the user group that need to be alerted during an outage. To add multiple users in a group, see User Alert Group.
- On-Call Schedule: The On-Call Schedule option helps you to ensure that the notifications are sent to assignees in specific shift hours helping them to quickly respond to alerts or incidents. Choose an On-Call of your preference from the drop-down.
You can receive alerts if the monitors are associated to user groups irrespective of the On-Call shift you've configured.
Third-Party Integration
- Services: Associate your monitor with a pre-configured third-party service. It lets you push your monitor alerts to selected services, and facilitate improved incident management.
If you haven't setup any integrations yet, navigate to Admin > Third-Party Integrations to create one. Third-Party Services to integrate your account with.
- Click Save to configure the monitor.
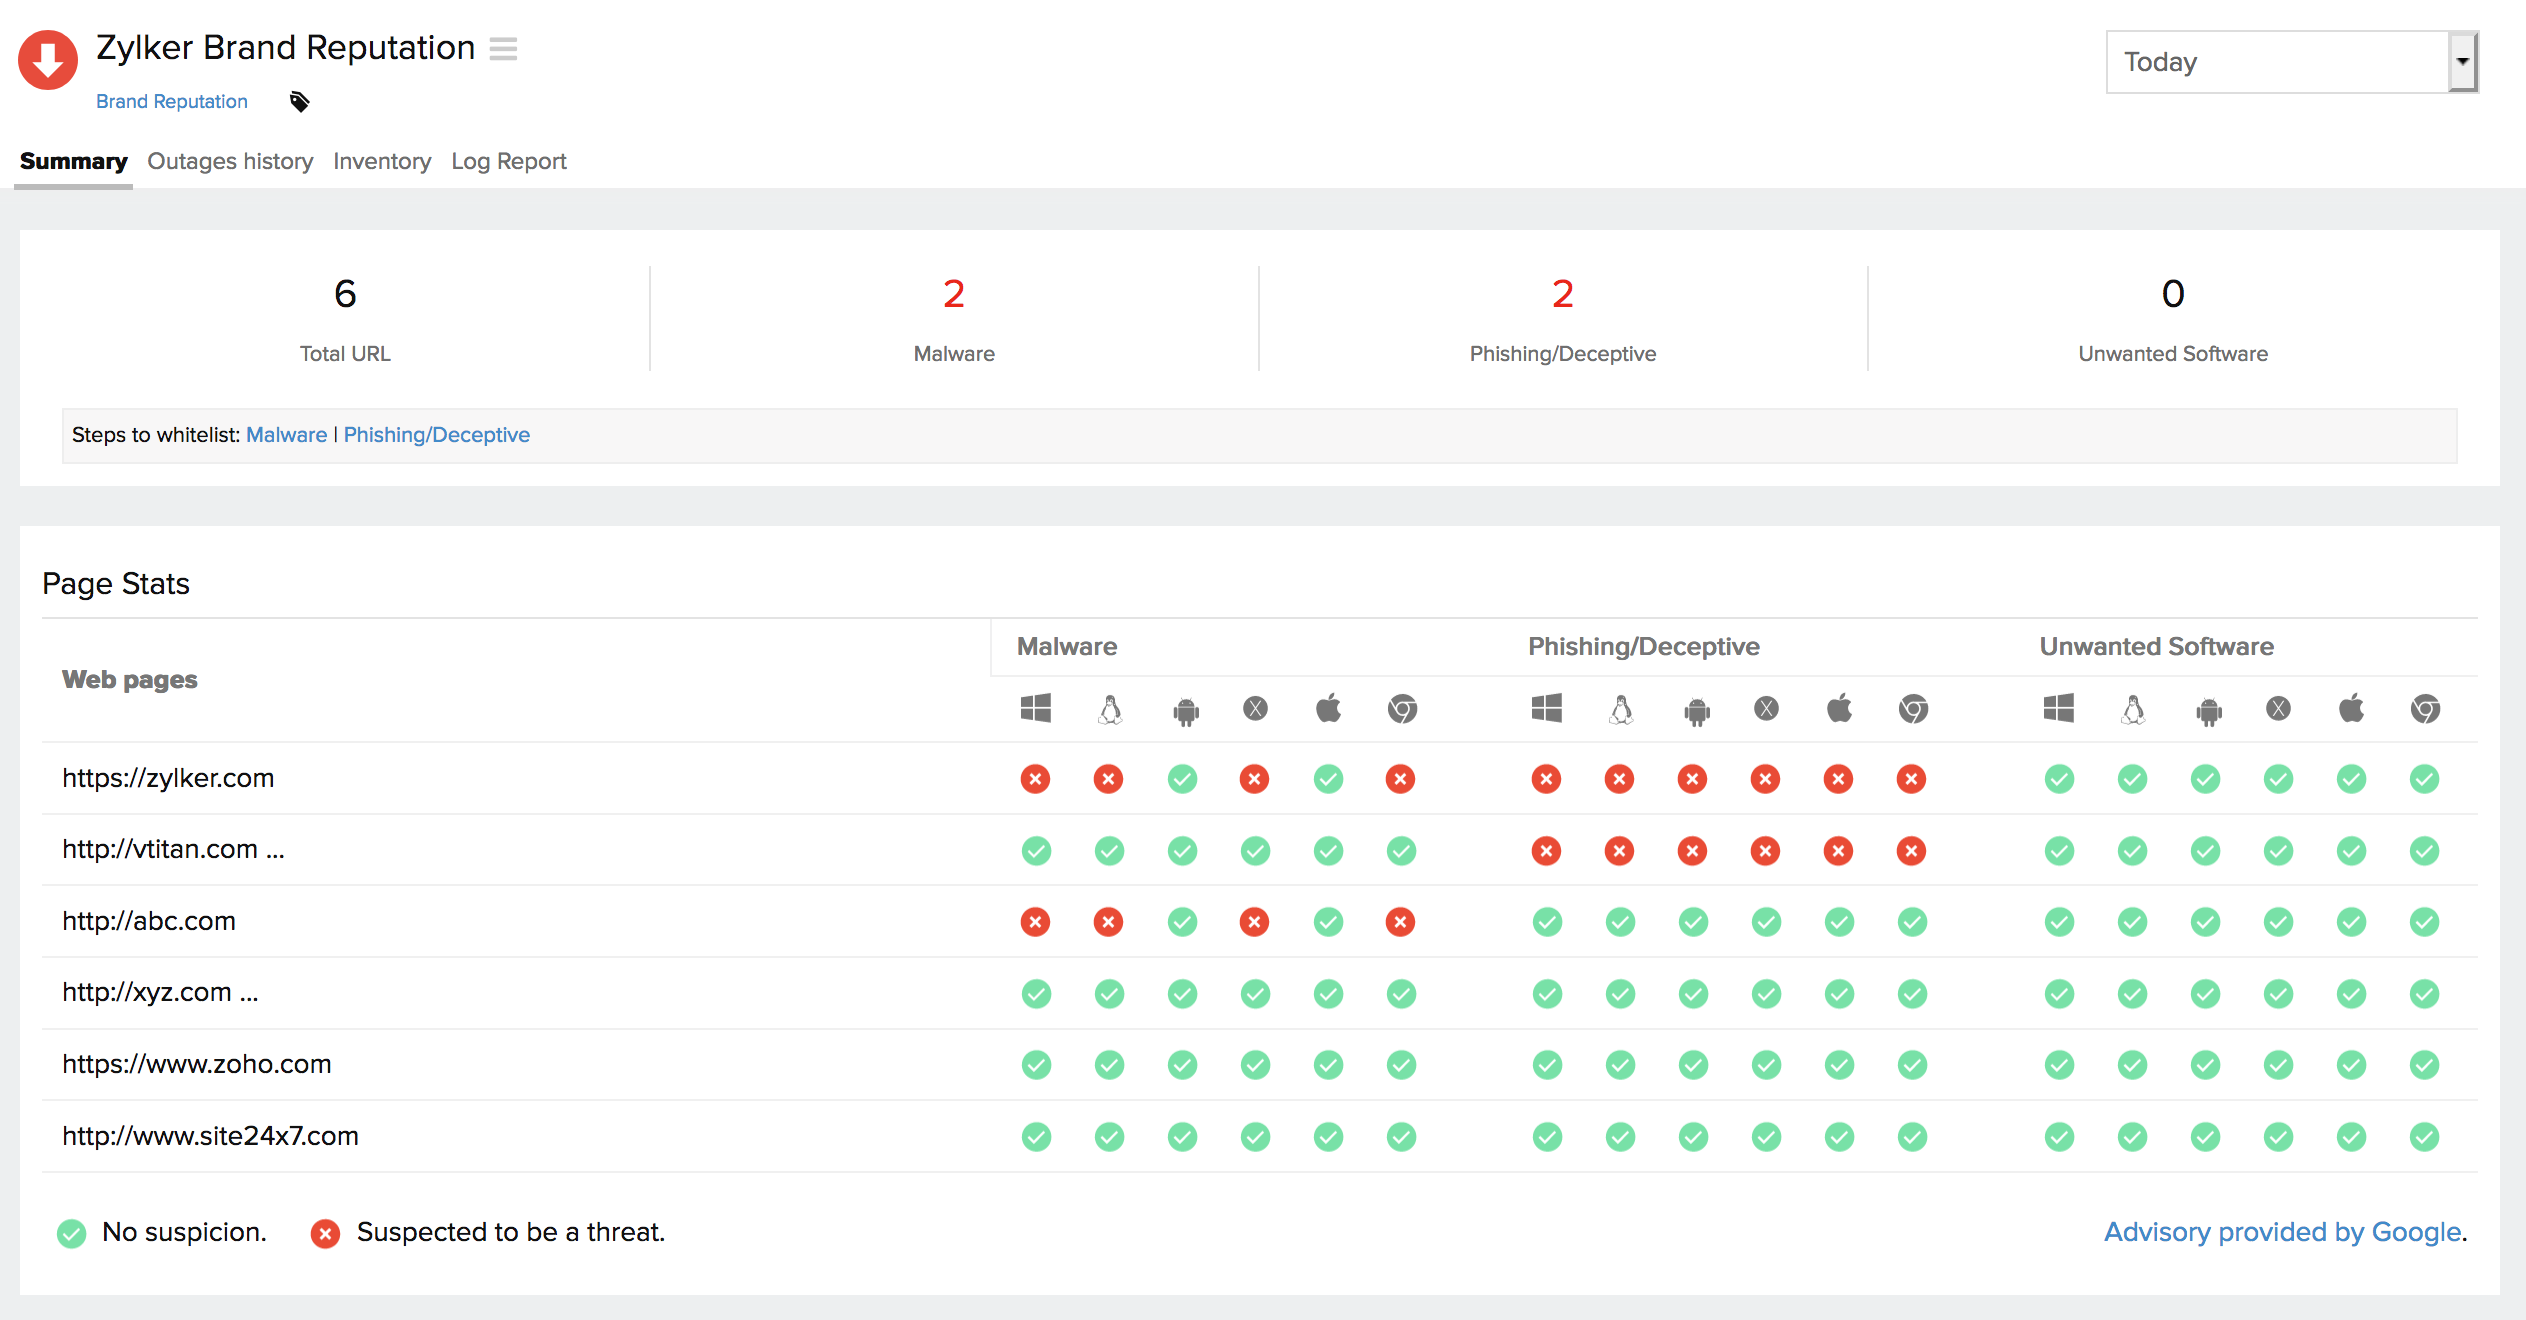
Interpreting Brand Reputation Results
Once a Brand Reputation monitor is added, you can access it from the Web tab. Click on a monitor to view the list of monitored URLs and their current status. Any URL that is subject to Malware or Phishing attacks or has an unwanted software update will be marked red after verifying with the advisory from Google's Web Risk list.

