Configure .NET agent via NuGet Package
Monitor your web applications built in .NET Core 2.1 and above with the help of APM Insight .NET Core Agent. APM Insight .NET Core agent helps to track HTTP Requests, SQL Queries, Web API calls and Remote calls in your ASP .NET Core applications . Application exceptions can be logged with the help of logger API provided.
This method of installation works both in Linux and Windows environment. Obtain the APM Insight .NET Core agent from Nuget by following the below given instructions - the steps are the same for both the environments.
Videos
Here's a quick video on how to install a Site24x7 APM Insight .NET Core agent in Windows.
Here's a quick video on how to install a Site24x7 APM Insight .NET Core agent in Linux.
To install .NET Core agent
- Add the Site24x7.DotNetCoreAgent to your project.
PM> Install-Package Site24x7.DotNetCoreAgent
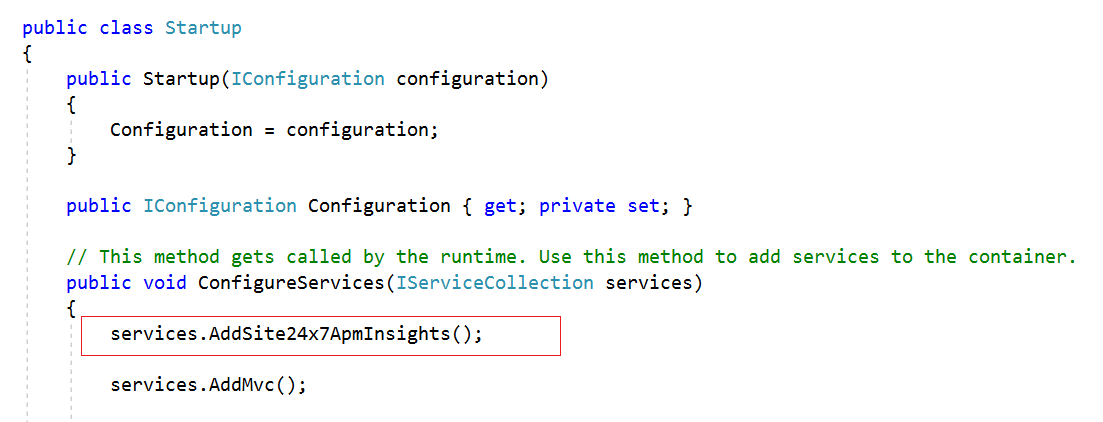
- Modify the ConfigureServices method in your Startup.cs file. Insert the following one line of code before the AddMvc() method as given in the screenshot
services.AddSite24x7ApmInsights();

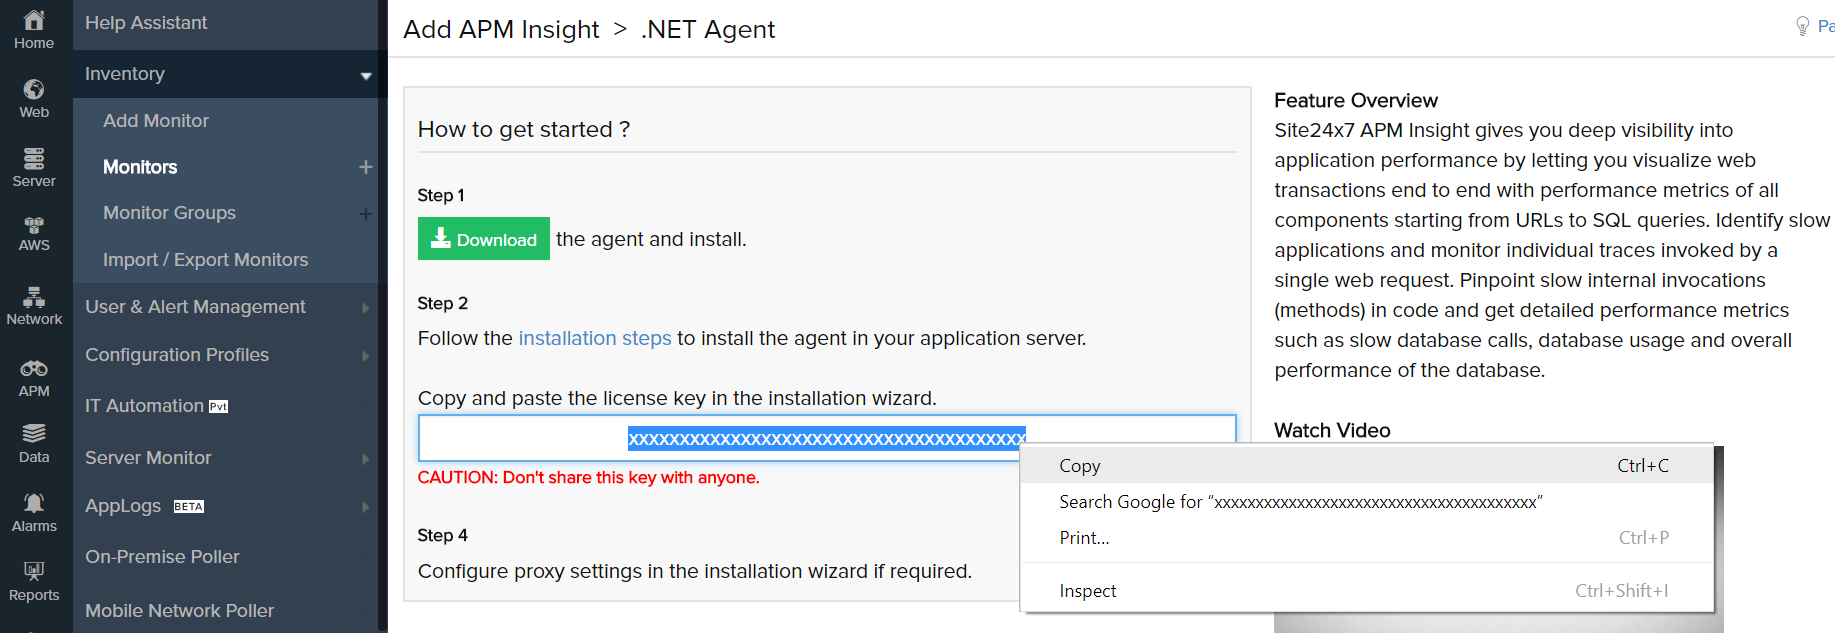
- Copy license key from the Site24x7 portal as given in the screenshot below

- If you want to add the license key, follow any of the two methods:
- Create an environment variable and paste the license key as mentioned below,
S247_LICENSE_KEY=<YOUR LICENSE KEY HERE> - Navigate to the configuration file in the application's publish directory,
- Go to <ApplicationPublishDirectory>\DotNetAgent\apminsight.conf
- If it is not available, create the same file in the above mentioned location.
- Add an entry in the file as, license.key=<YOUR_LICENSE_KEY>
- Create an environment variable and paste the license key as mentioned below,
- Publish and deploy your web application.
- The application name will be created by default with the ASP.NET Core application name.
- If you want to change the application name, follow any of the two methods:
- Create an environment variable and set the application name as mentioned below,
SITE24X7_APP_NAME=<YOUR_APPLICATION_NAME> - Navigate to the configuration file in the application's publish directory,
- Create an environment variable and set the application name as mentioned below,
-
- Go to <ApplicationPublishDirectory>\DotNetAgent\apminsight.conf
- If it is not available, create the same file in the above mentioned location.
- Add an entry in the file as, application.name=<YOUR_APPLICATION_NAME>
- Perform the transactions to collect performance metrics.
- The following image explains the installation procedure

To uninstall .NET Core Agent
- Open .NET Core application project in Visual Studio IDE.
- Go to startup.cs file and remove the below line of code,
services.AddSite24x7ApmInsights();
- Right click on project and select Manage NuGet Packages...
- Select Site24x7.DotNetCoreAgent from the installed packages list.
- Click Uninstall to remove the APM Insight .NET Core agent.
- Publish and deploy the application.

-
On this page
- Videos
- To install NET Core agent
- To uninstall NET Core Agent
